

In this post I will share my experience installing the rooted version of Offensive Security's NetHunter onto a OnePlus 7T mobile phone and provide detailed procedures. For those unaware, NetHunter is the mobile version of Kali Linux. If you are unaware of Kali Linux or NetHunter, I encourage you to learn more about it before diving into this tutorial.
As some background on my motivations for installing NetHunter, I wanted to assess the functionality that would be available on a mobile device as this had obvious benefits from a social engineering perspective during a pentest. What I discovered after installing NetHunter is that it didn't quite live up to my expectations, though had I done more thorough research on NetHunter prior to install my expectations would have been set appropriately.
The main issue is that even if you successfully install a rooted version of NetHunter, you will still need an external WiFi card and external Bluetooth card if you wish to perform wireless/bluetooth monitoring or attacks from your phone. Walking around with a WiFi antenna sticking out your phone isn't as inconspicious as we would like from a social engineering standpoint, plus the power coming out of your phone's USB port isn't likely to power your external WiFi card to any signal stength comparable to the phone itself or to its use with a laptop. According to the NetHunter website, the Nexus 5 supports monitoring functionality using the native adapters in the phone, which to me would be the whole point of using a phone for pentesting. However, other benefits of NetHunter are available though admittedly many of those are available in the rootless version.
That all said, this tutorial was created in an effort to provide more information to the community in hopes that more developers will take up the OnePlus 7T NetHunter support. I will also make an attempt to explain some of the concepts I learned through my research as most of the information on NetHunter and other tutorials on similar topics assume the reader has experience in rooting/flashing custom ROMs on Android devices. I found many resources online frustrating void of context. A few words mentioning that you must flash Magisk with TWRP and NetHunter with Magisk only makes sense if you know the purpose of those tools and how to use them. My hope is this writeup will help beginners to understand the NetHunter install process, even if you're strugging with the install on a different device from the OnePlus 7T.
Before diving in, let's put up some disclaimers. While the NetHunter image itself is listed as supported for the OnePlus 7T and this tutorial uses the official releases from the Offensive Security website, we'll be using software components developed by the opensource community, including TWRP which does not officially support the 7T as of writing.
On to some general warnings. In this tutorial, you will completely blow away all the data on your OnePlus 7T multiple times. Backup any data on your phone you wish to keep before performing any steps.
Charge your device fully before beginning these steps. If your phone shuts off in the middle of flashing it, you'll likely brick the device and will need to start these instructions over.
Also, please note that this tutorial utilizes tools provided by the community at the XDA Developers' Forum that are not officially supported by Offensive Security, TWRP, or OnePlus. You will be installing this software on your phone and a Windows device with the highest privilges possible. As with all software you install, it is your responsibility to ensure these components do not contain malicious logic that may harm your systems or your client's systems. I'm not vouching for any software listed below. Information provided here is for educational purposes only and Auspicious Security or the author will not be held responsible for any consequences that may result from these instructions.
And with that, on to the tutorial.
First, I'll list out the prerequisites for this tutorial. You will need:
There are a couple different USB drivers we will need.
First, we will download the OnePlus 7T USB drivers that are available on the phone itself. These will allow us to connect to the phone using ADB and Fastboot, part of the Android SDK Platform Tools. These are the standard tools to interacting with, debugging, and pentesting Android. Second, we will download Qualcomm USB drivers to interact with the recovery features built into the phone's processor, allowing us to unbrick the device if necessary.
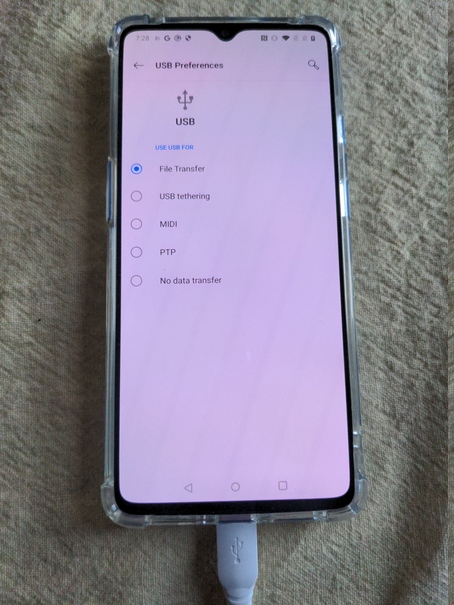
To download the OnePlus USB drivers, turn on your OnePlus 7T. In your Windows 10 machine, plug your OnePlus 7T in via USB data cable. Unlock OnePlus 7T (if required). View your notifications and double-tap “Android System - Charging this device via USB”. This will open USB Preferences. Select “File Transfer” to unlock the file system via USB.
In your Windows 10 machine, the file system should become available and also a CD image “OnePlus Drivers” will be mounted. Open the CD and run the application “OnePlus_USB_Drivers_Setup” to launch the driver installation. Follow the install wizard.
We'll install the Qualcomm Snapsdragon USB Drivers, if needed, in the next step.
In the event that your device is stuck in a boot-loop or otherwise bricked you can recover it using the built-in Snapdragon recovery functionality. I recommend performing this step prior to the install as it will 1) set the phone to the common starting point in which this tutorial was developed and 2) prove (to yourself) that you can recover the phone from being completely bricked, before that happens and this becomes your only option (and for whatever reason you can't get the Qualcomm drivers to work with your Windows 10 device). However, if you are already running version 10 of Oxygen OS on your device and feeling auspicious, you can skip this step and return to it if you have problems with the install or brick your device.
Let's make sure we get the proper Qualcomm USB drivers installed so Windows can interact with the device in Qualcomm Recovery Mode.
Power off your OnePlus device. We now need to boot the device into the processor's recovery mode. To do this, with the device powered off, hold the Volume+ and Volume- buttons for about 5 seconds. Then, still holding those buttons, connect the laptop via USB data cable. Windows 10 should chime indicating something USB related was plugged into it, though the phone will not provide any feedback and the screen will remain off.
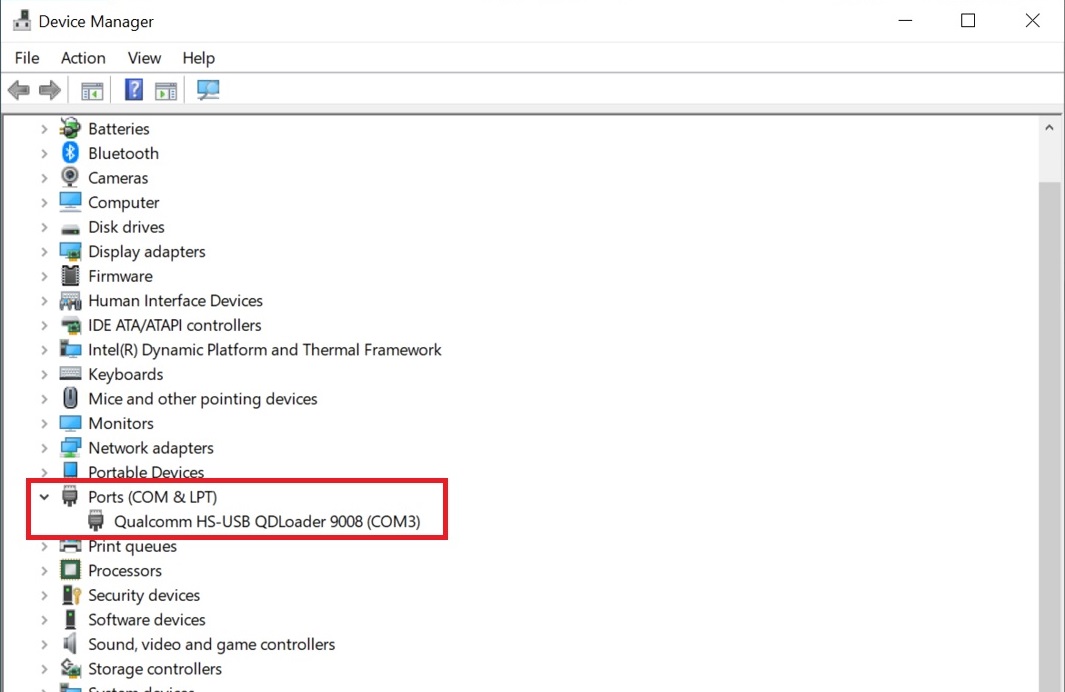
Within Windows 10, open Device Manager. There should be a device under “Ports (COM & LPT)”. If it says “Qualcomm HS-USB QDLoader 9008” then Windows was able to successfully install the driver. If it says “QUSB_BLK” then you'll need to manually install the Qualcomm drivers. I had the best luck with this install while my device was plugged in via USB in the Snapdragon recovery mode.
If you need to install the Qualcomm drivers: Download the QDLoaderHS_USB_Driver_64bit_Setup.exe file from the link above. Downloading drivers from the internet is always a risky proposition, as drivers will have elevated access to the Windows OS. Looking around at the options available, I decided to download from the Xiaomi website, though if you don't trust this download source feel free to search around Google until yourself find a better option. With the phone still plugged in, run the installer and it should update your driver to “Qualcomm HS-USB QDLoader 9008”.
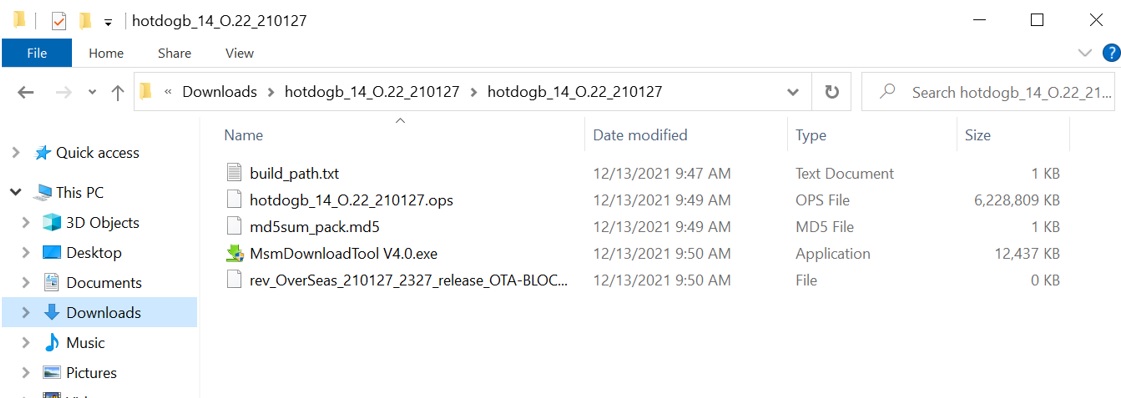
With the drivers properly installed, download the OnePlus 7T Oxygen OS 10 Unbrick tool (hotdogb_14_O.22_210127.zip) file on your Windows 10 machine. Unzip the contents.
Now for the first dangerous step that comes with a warning. We will need to enable test driver signing in Windows which will allow the unsigned driver within the MsmDownloadTool (hotdogb_14_O.22_210127.zip) to run. Malicious code in drivers has the ability to install some nasty stuff on your machine so take the usual precautions when running potentially malicious code.
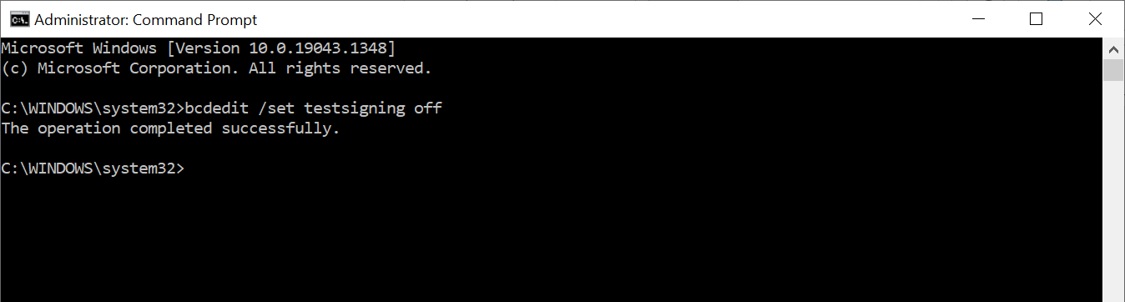
To enable test driver signing, open an administrative command prompt in Windows and enter the following command:
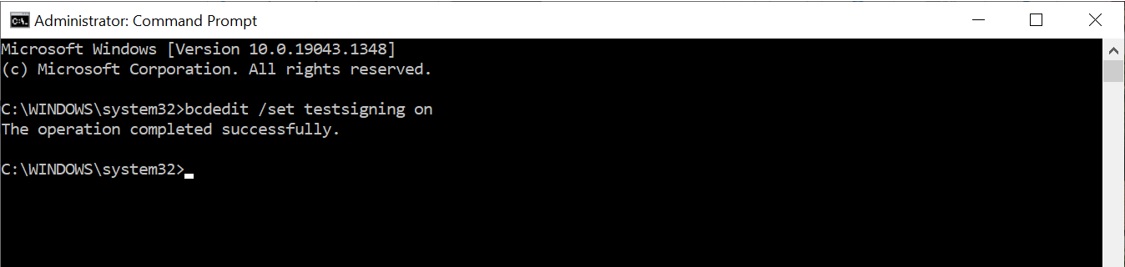
Reboot your Windows 10 device. When it comes back up you should see “Test Mode” and additional OS information in the bottom right of your desktop.
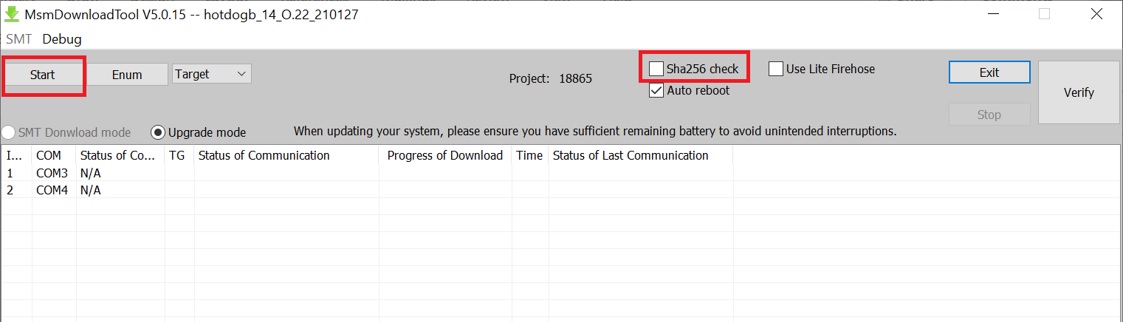
Navigate to your unzipped hotdogb_14_O.22_210127 folder and launch the MsmDownloadTool V4.0.exe application. It will need to run with administrative privileges. This application is used to flash your device back to a stock OS and will relock the bootloader.
I had issues with the “Sha256 check" option enabled so uncheck this box (feel free to try the installation with this checked. If it doesn't work, uncheck it). Note the location of the Start button, but don't press it yet. You will press Start once the device is successfully connected.
Now to prep the device and ourselves for the next steps. Read through these instructions so you understand the process before attempting it, as you'll have only a few seconds to get the device into the correct mode for flashing. If you followed the instructions above to check the driver, you will need to turn on your phone and turn it off. If you have trouble shutting down from Qualcomm Recovery Mode, try holding Volume+, Volume-, and Power buttons simultaneously until your device restarts.
Ensure your device is shut down. Connect your USB data cable to the Windows 10 USB port (I only had success with a particular USB port). Do not connect the cable to your phone just yet (disconnect the USB cable from your phone if it is already connected).
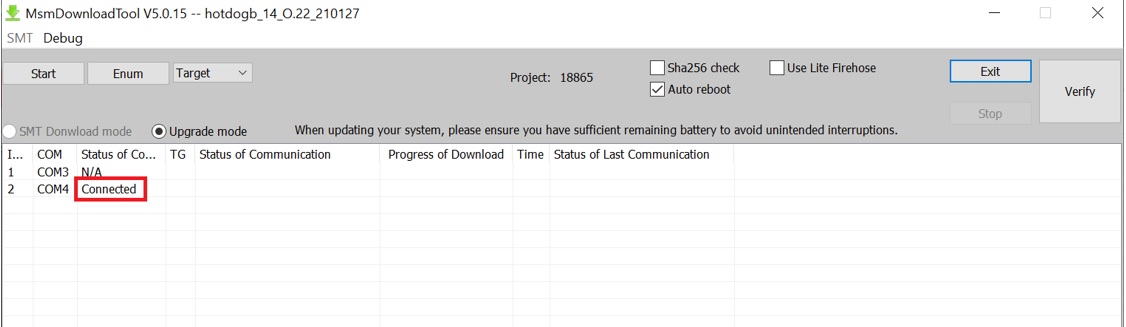
With the phone shut down, hold both the Volume+ and Volume- buttons on the left side of the device and count for 5 seconds. Then plug the USB cable into the phone. If the drivers are working, and you are connected to the correct USB port, the Status of Connection column in the application will be updated to “Connected”.
 You will then immediately need to click the “Start” button, which will start the download process. Supposedly, you have about 10 seconds to click the Start button or the processor will not longer allow device recovery.
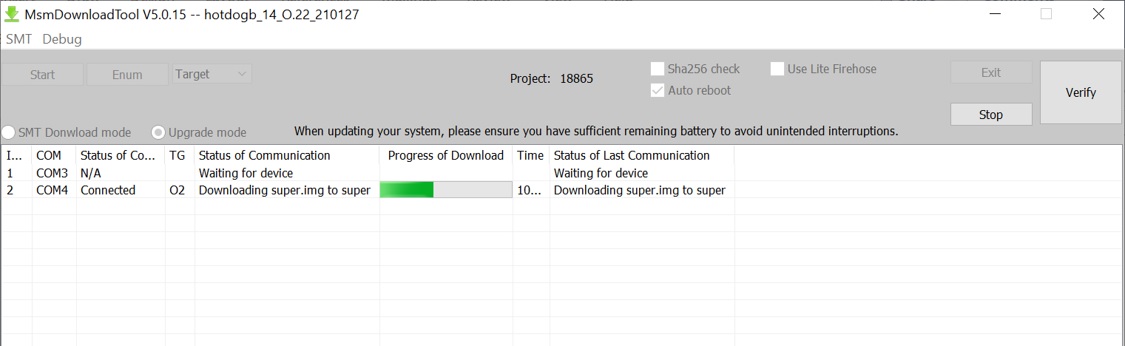
Once you get the above steps working, allow the phone to be flashed which will take several minutes.

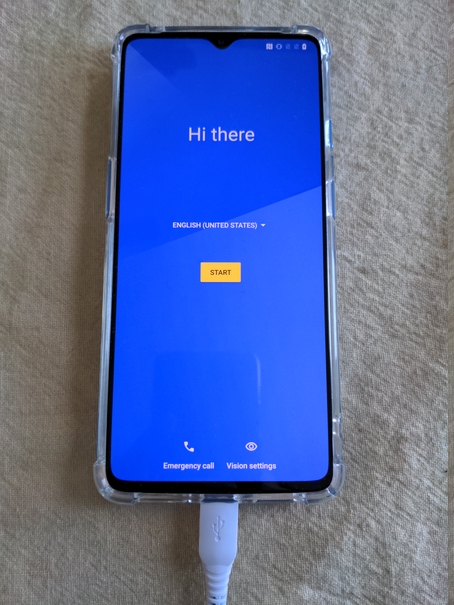
Once the download is completed your phone should reboot into the Oxygen OS 10 setup screen. Go through these screens and setup your device. At this point, there is no point to setup a Mobile Network, WiFi, or other settings as we'll be blowing away this data again later.
Back on Windows 10, let's turn off Test Driver Signing because that's scary and we don't need it anymore. Open an administrator command prompt and enter the following command.
Restart your Windows 10 device.
Your bootloader is locked by the manufacturer and is locked following the execution of the unbrick utility as described above. The bootloader is important as it protects the Android Operating System from loading unsigned code which helps to avoid nasty rootkits from subverting the phone. In order to root your phone and install any sort of custom OS, you'll need to unlock your bootloader.
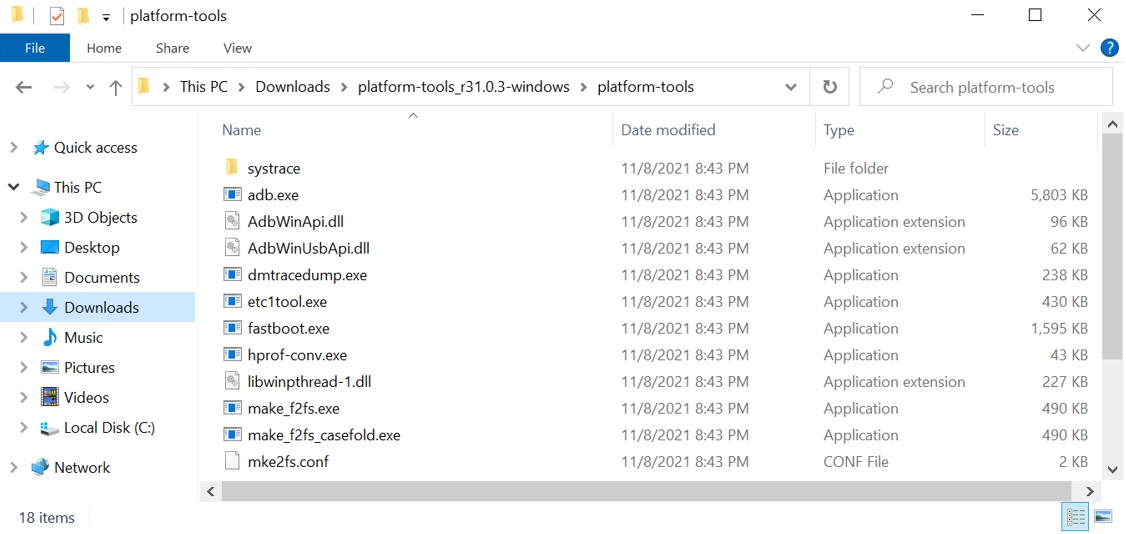
Before we get to unlocking the bootloader, let's setup the Android SDK Platform Tools on your Windows 10 device so we can interact with our phone via ADB and Fastboot. I'll continue these instructions on Windows 10, but if you prefer to use these tools on Linux or Mac, they should work as long as you can figure out the drivers. Download the latest Android SDK Platform Tools from the Android site and unzip the folder somewhere convenient.
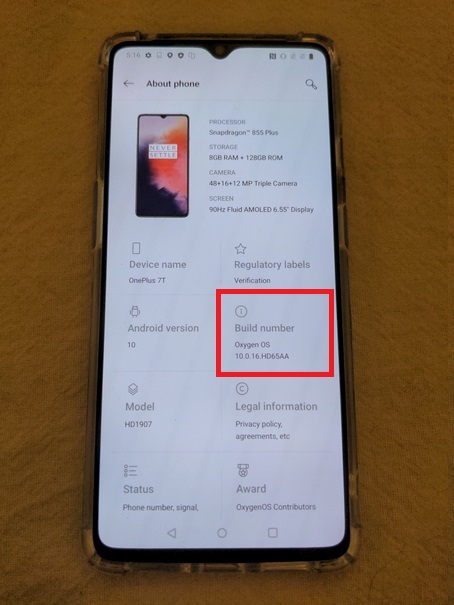
Back on your phone, navigate to the Settings app. We must first enable the super secret Developer Options. To do so click “About Phone” under Settings. Tap the “Build number” section on the screen 7 times until it says “You are now a developer”.
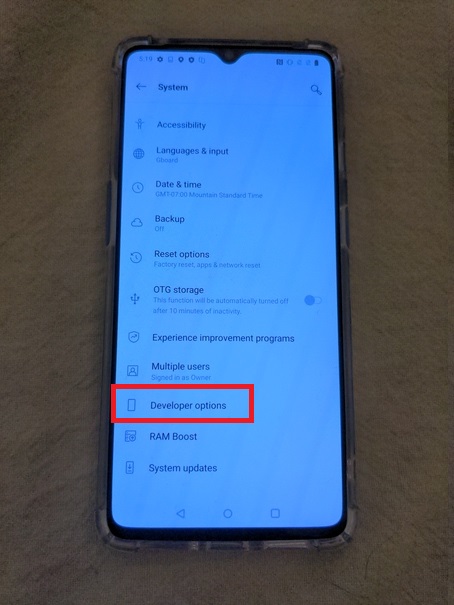
Go back to Settings and then click under System. Toward the bottom tap “Developer options”.
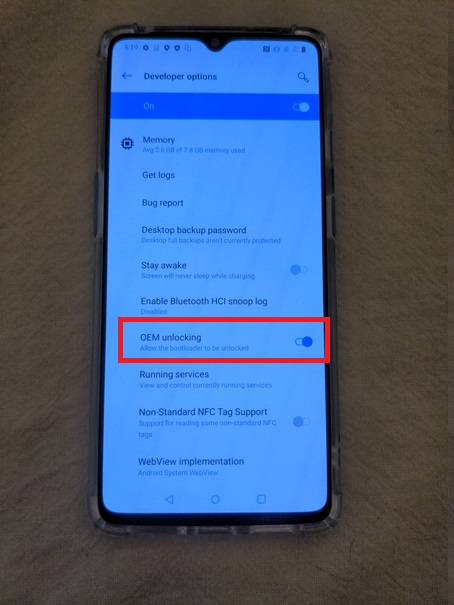
Within Developer options, enable OEM Unlocking.
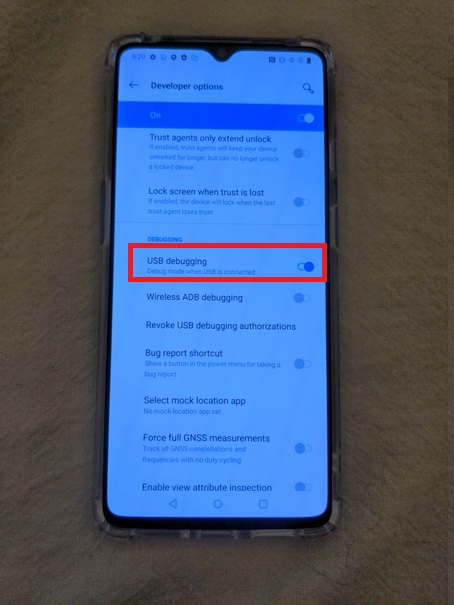
Also within Developer options, enable USB Debugging.
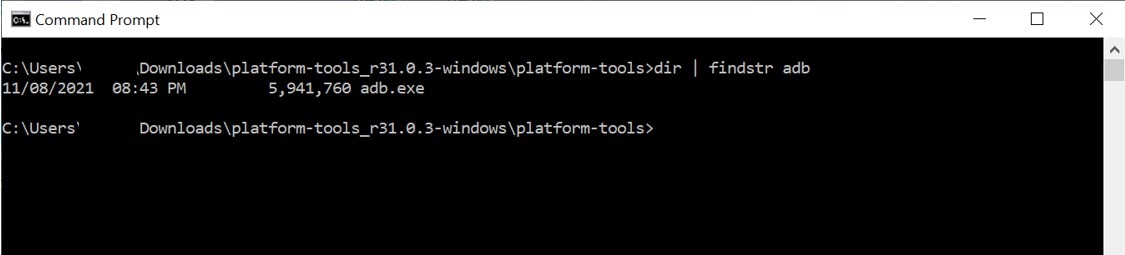
Connect your phone to your Windows 10 device via the USB data cable. Open a command prompt and navigate to your platform-tools folder.
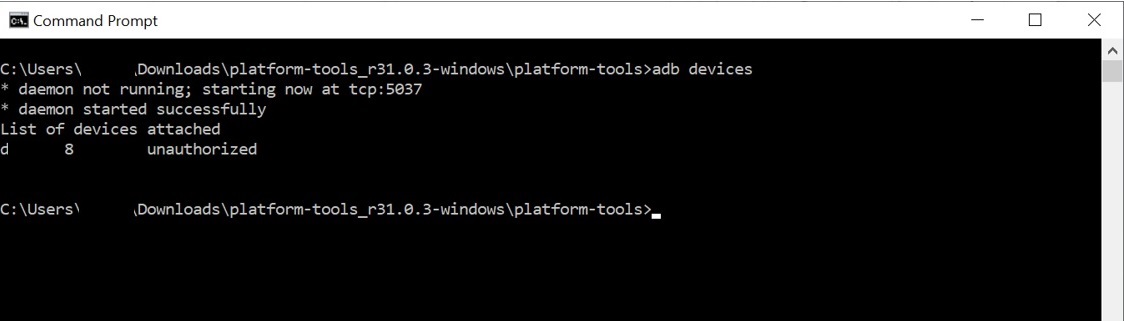
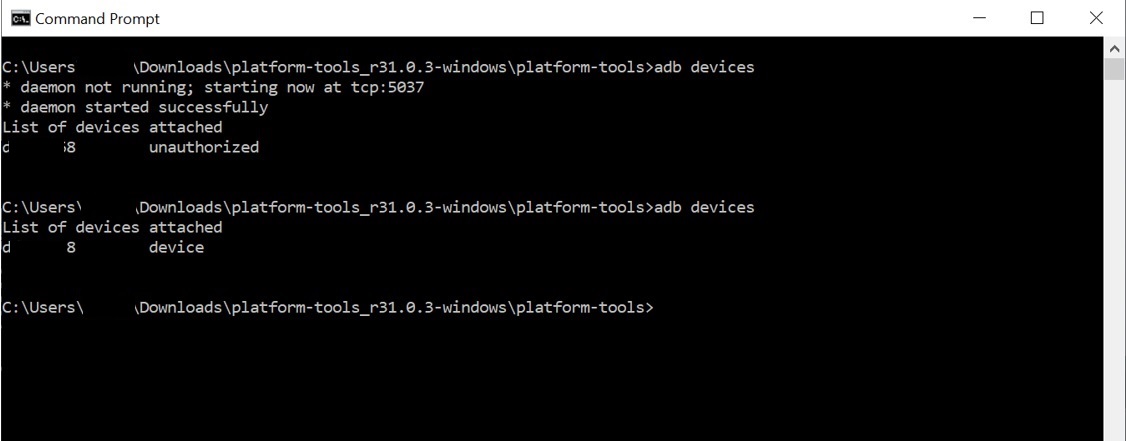
Type the following command to start the ADB (Android DeBug) server on your computer:
The command prompt should show a device attached but will say “unauthorized”. If you don't see any device listed, you have an issue with your USB drivers that you will need to figure out.
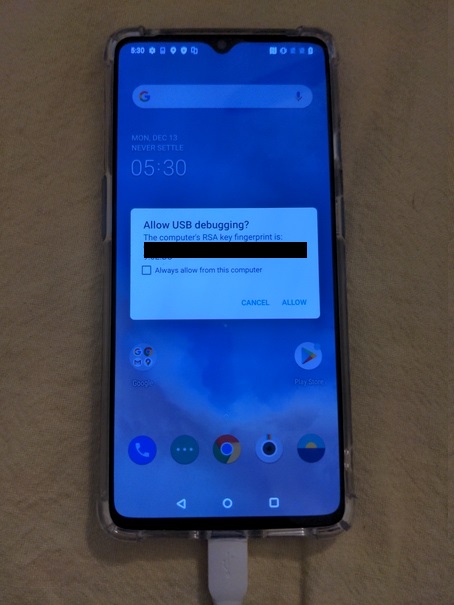
You will receive a notification on your phone prompting you to allow USB debugging for a particular device. Tap Allow.
Repeat the following command on the Windows 10 device and you should now see the device listed as "device" which is no longer unauthorized.
Awesome, now we'll reboot the phone into the bootloader. Type the following command in your Windows 10 command prompt.
Your phone will reboot into the bootloader. Note that the device state is listed as locked.
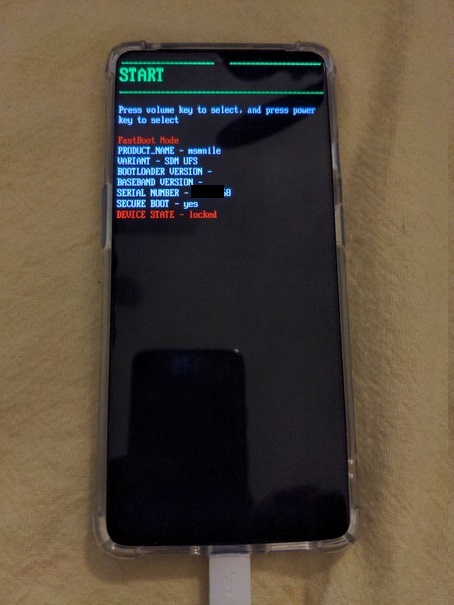
Fun fact: you can also boot your OnePlus 7T into Fastboot mode by turning it off and holding down the Volume+, Volume- and Power buttons simultaneously. From the Fastboot menu, use Volume+/Volume- to select different boot options. For me, using ADB is more elegant but this key combo may come in handy for you at some point.
Back on your Windows 10 command prompt enter the following command to double check that we are still able to interact via USB debugging.
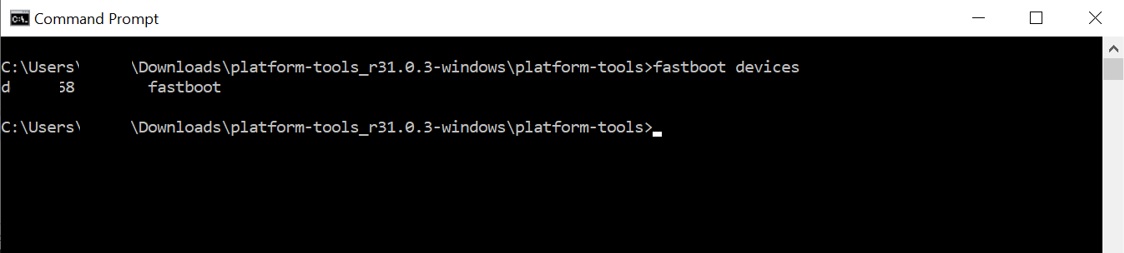
There should still be one entry listed. If you don't see any device listed, this is likely a USB fastboot driver issue. There is a signature issue with the USB drivers included with the OnePlus 7T that I ran into. You can verify if this is your issue by manually updating the driver from Device Manager and selecting the location: C:\Program Files (x86)\OnePlus USB Drivers. The driver installation will fail with the following error.
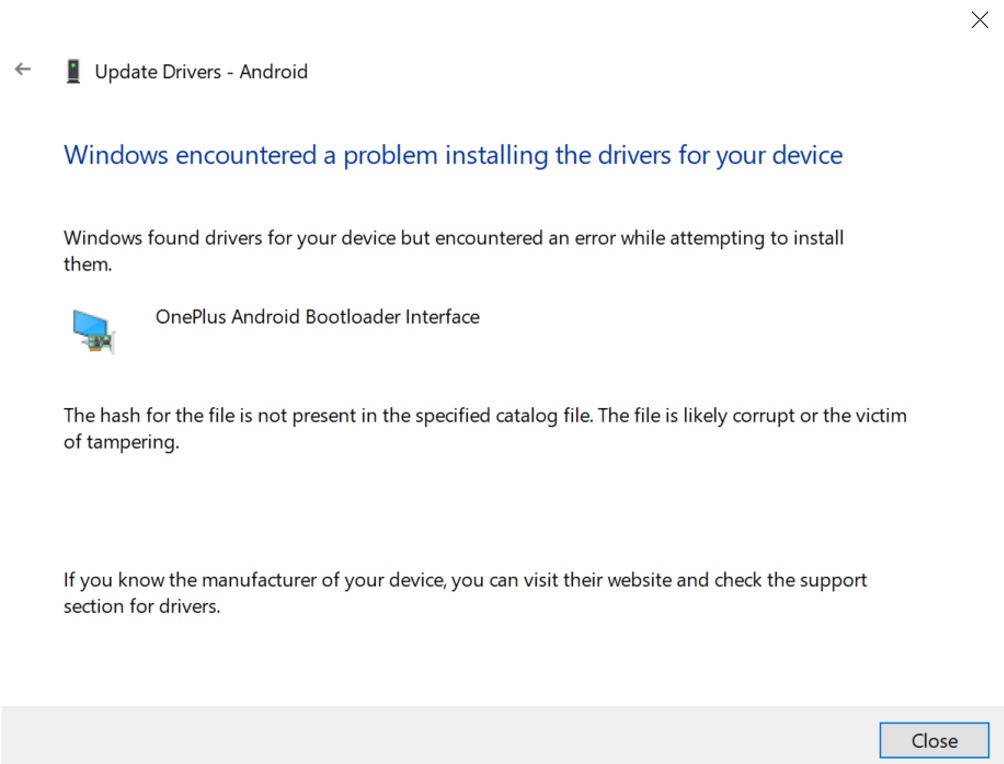
To troubleshoot, check the post https://forum.xda-developers.com/t/guide-fix-device-not-showing-up-in-fastboot-mode-windows-10.4194491/ for troubleshooting this driver signature error. You'll have to reboot your computer in Advanced Startup so that Windows ignores driver signatures, which will allow you to install the Fastboot driver. Again, this is dubious but at least the drivers came directly from your OnePlus phone and not some random website.
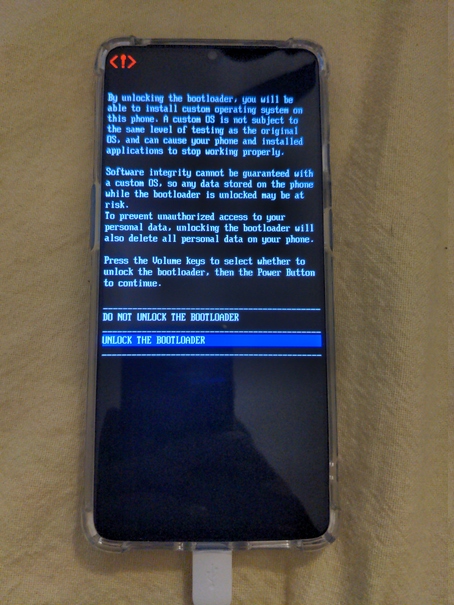
At this point, hopefully you've got the drivers all figured out. Now we'll unlock the bootloader with the following command.
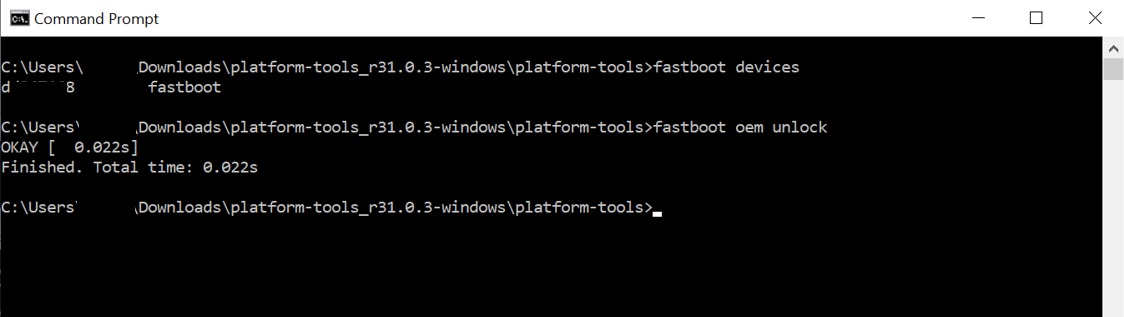
On your device you will receive some information explaining about the bootloader and some warnings. Click the Volume- button twice to select “Unlock the bootloader” and then click the Power button.
Your device will reboot and from now on you'll be privvy to receiving a warning about the bootloader being unlocked at every boot. Unlocking the bootloader wipes the device so once booted you'll need to setup the Android OS again. Again, skip setting up mobile networks or WiFi as we're going to blow away those settings yet again.
TeamWin Recovery Project (TWRP - pronounced “twerp” - https://twrp.me) is an open source recovery app for Android devices. This bootable recovery offers advanced features for loading custom ROMs and installing apps on android devices. At the time of writing, the TWRP website claims the OnePlus 7T is supported, the download links for hotdogb (7T) point to the same hotdog (7T Pro) version. I was unable to get this official version to properly install Magisk and thus we will use the unofficial TWRP referenced. By the time you read this, things may have changed so it may be worth giving the official version a try. Reflashing a different recovery is trivial, and worst case you can always run the unbrick tool.
On with flashing TWRP. Go back into Settings and unlock the Developer options (Settings -> About phone -> Tap “Build number” 7 times). Then enable USB debugging (Settings -> System -> Developer options -> Enable USB debugging). Connect your phone to your computer via USB data cable if it isn't already. If you are prompted to allow USB debugging on your device then your ADB server is still running. If not, you can start the ADB server again by opening a command prompt, navigating to your platform-tools folder, and entering the following command.
Let's reboot back into the bootloader with the following command.
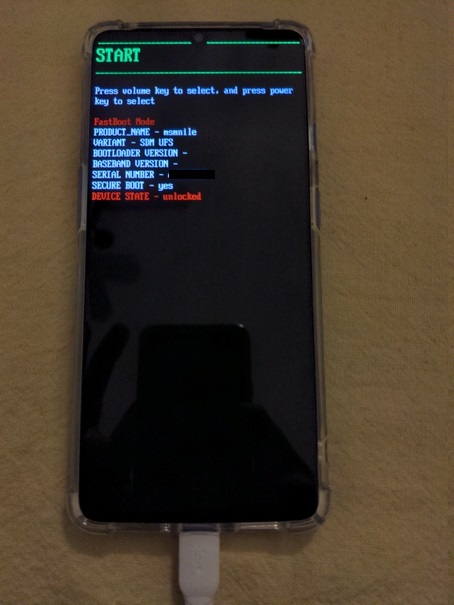
Back in the fastboot mode you should see that device state is now “unlocked”. If this is not the case, something went wrong so repeat the previous section.
On your Windows 10 machine, download the unofficial TWRP from the link above. Based on the current version at the time of writing, the file I'm using is "twrp-3-5-2_11-hotdog-20211019-oos.img". Copy this file to your platform-tools folder and then enter the following command to boot TWRP with this image (modifying the image file name accordingly if you are using a different version).
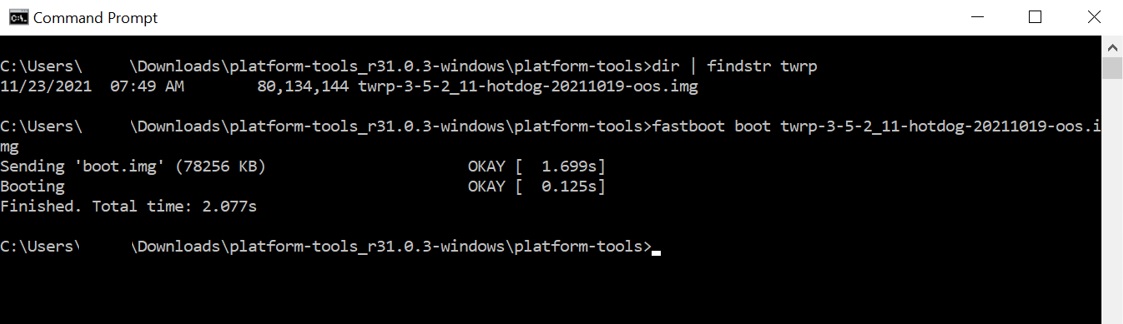
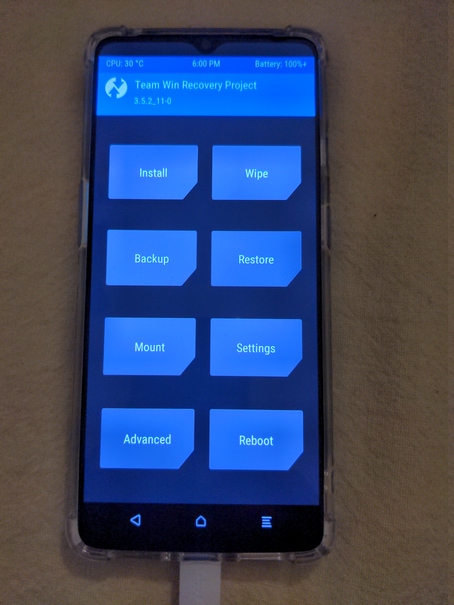
Your device will boot into TWRP.
Plug your USB drive into your Windows 10 device and copy the following downloaded files to the USB drive. Note that you'll need to rename the Magisk file extension from .apk to .zip.
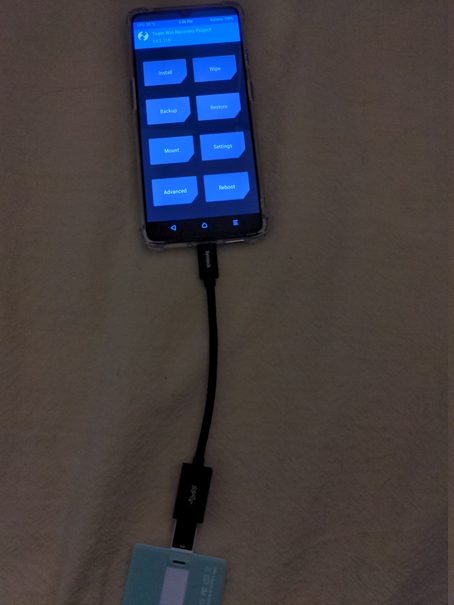
First, we will install the TWRP image on the recovery partitions. Unplug your phone from your computer and plug in the USB drive using the OTG cable.
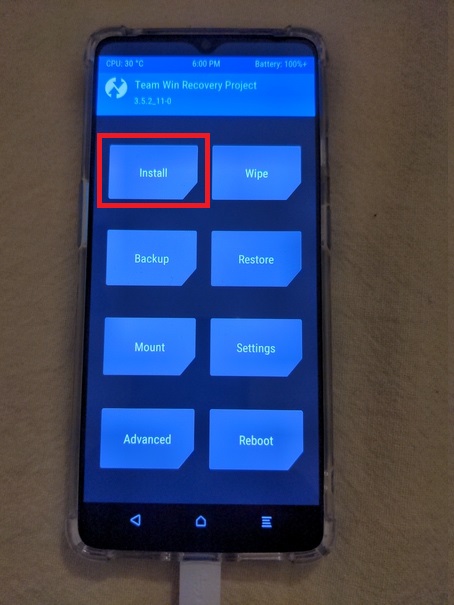
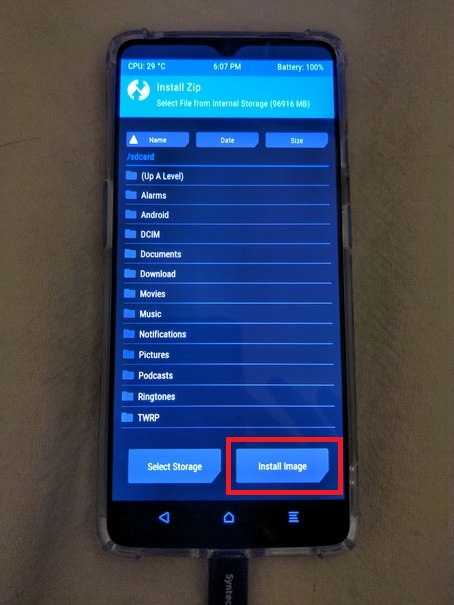
In TWRP click Install.
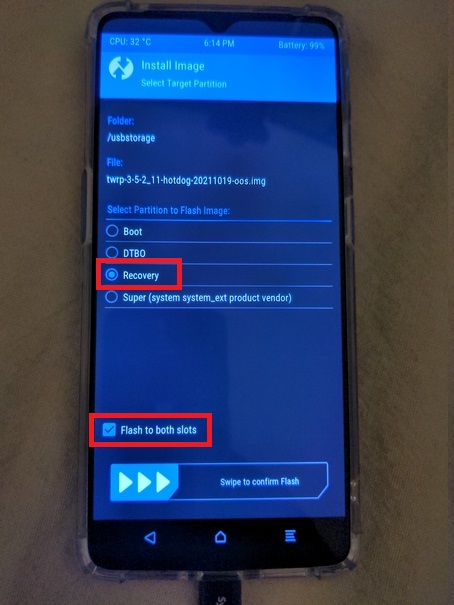
Since we have an .img file to install and not a .zip click the Install Image button.
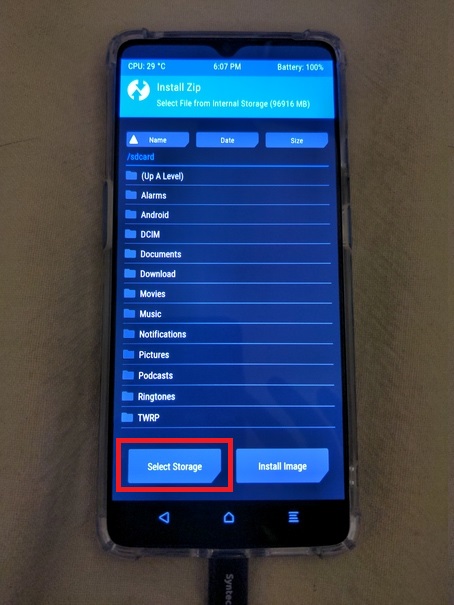
Then pick the Select Storage button.
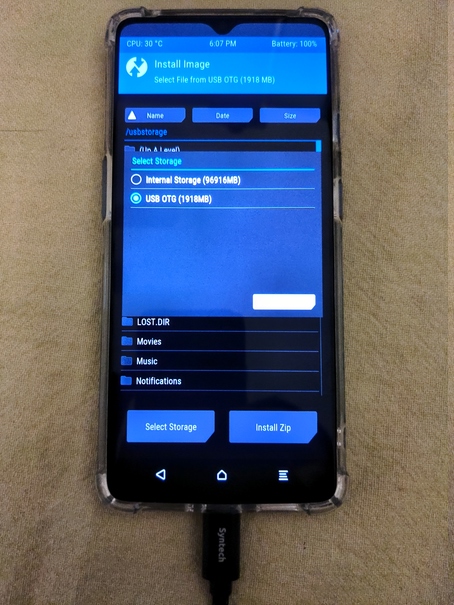
Press USB OTG (it will initially think it is 0 MB available until you click it) and then OK.
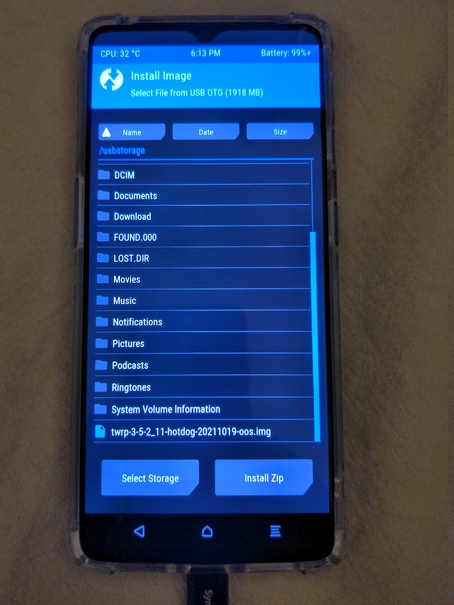
Select the twrp-3-5-2_11-hotdog-20211019-oos.img file. This will install the same TWRP version we are running to the phone, so we don't need to keep loading the image into memory.
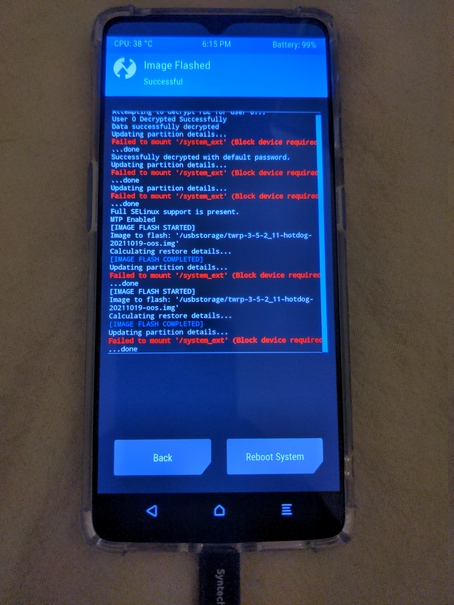
Select the Recovery partition and then check the box “Flash to both slots”. Then Swipe the bottom to confirm flashing the recovery partitions. Wait a moment of the flashing to complete.
My TWRP still complains about the /system_ext directory not existing, but it doesn't seem to be a real issue so ignore this.
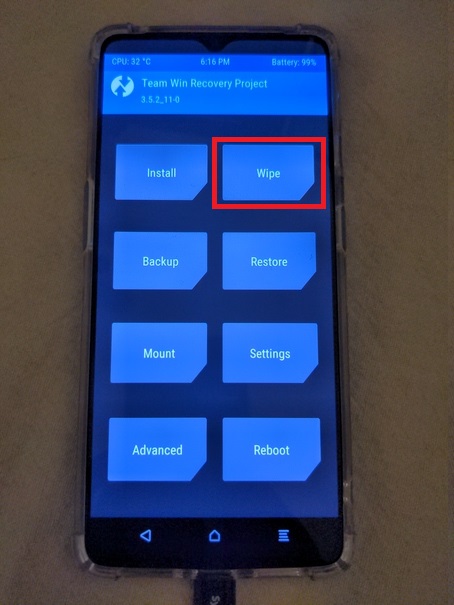
Go back three times to the main TWRP screen and select the Wipe option.
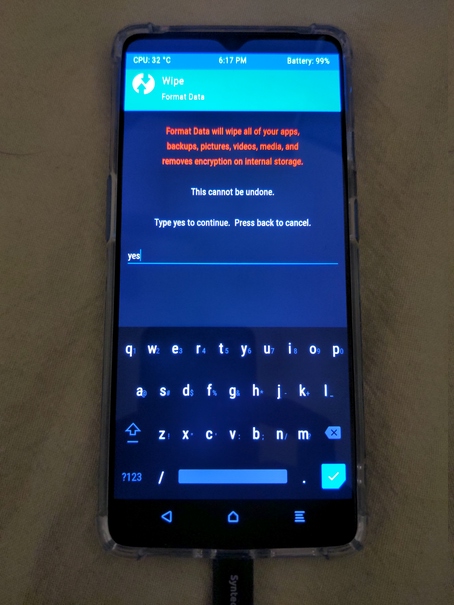
Select “Format Data”.
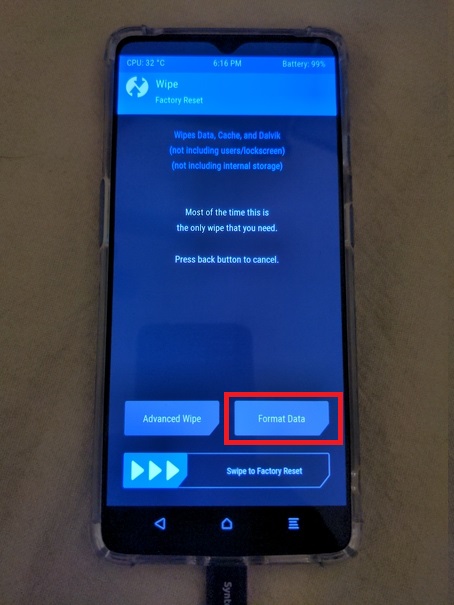
Type “yes” and press the blue enter check mark to wipe your device yet again.
 Resist the temptation to reboot directly from this screen and press back three times to get to the main TWRP screen.
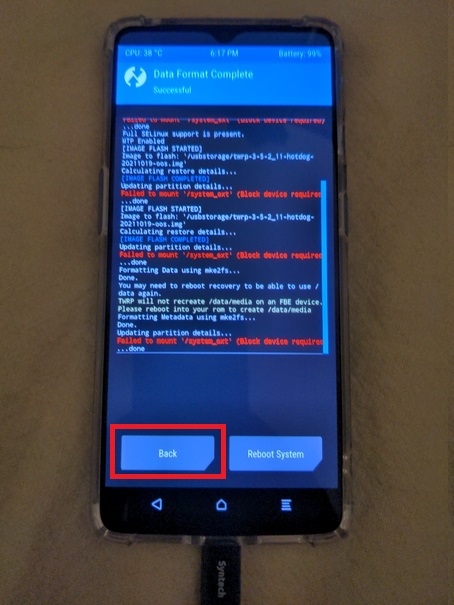 Select “Reboot” from the main TWRP screen.

Pick the “Recovery” option.
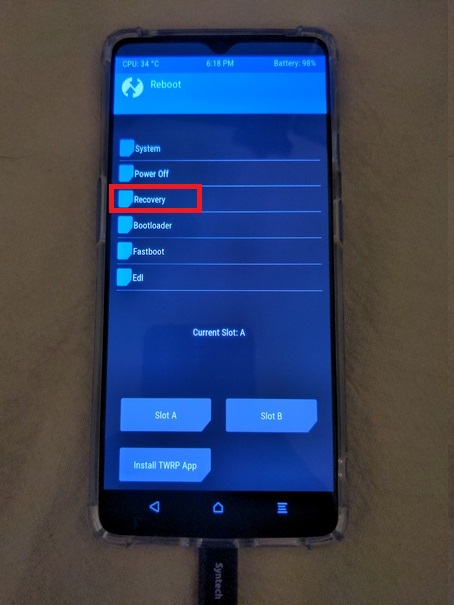
Your phone will boot into TWRP again, but this time instead of loading the recovery from memory it will load from one of the two recovery slots.
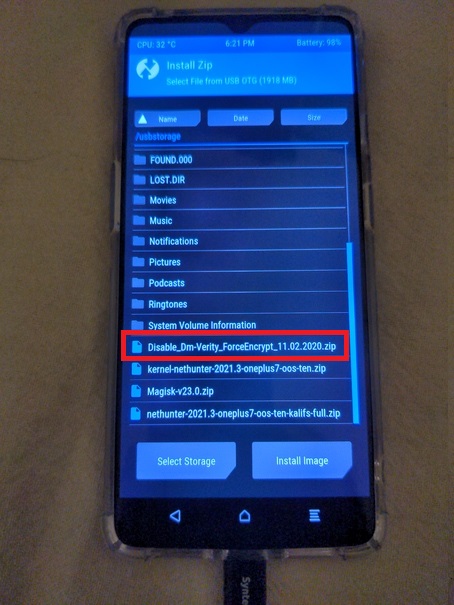
We will now install the Dm-Verity Force Encrypt app which will unencrypt our phone and then install the Magisk app which will facilitate rooting our phone. These are both necessary for the NetHunter install. When TWRP loads, click the Install button.
Pick the option Select Storage.
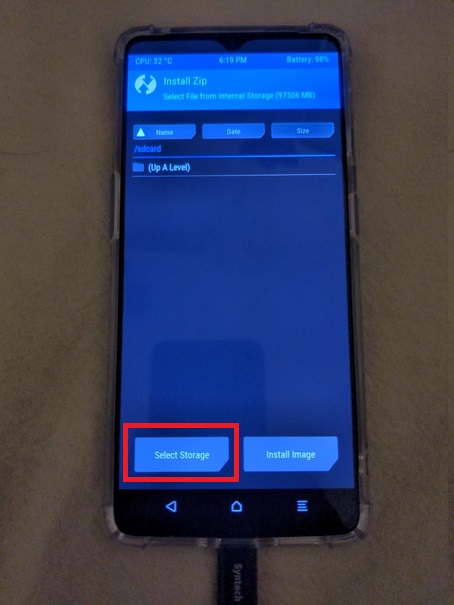
Select USB OTG.
Select the Disable_Dm-Verity_ForceEncrypt_11.02.2020.zip.
Leave the options default and swipe to confirm.

Wait for the install to complete, ignoring the "failure to mount" messages. Select the Back button.
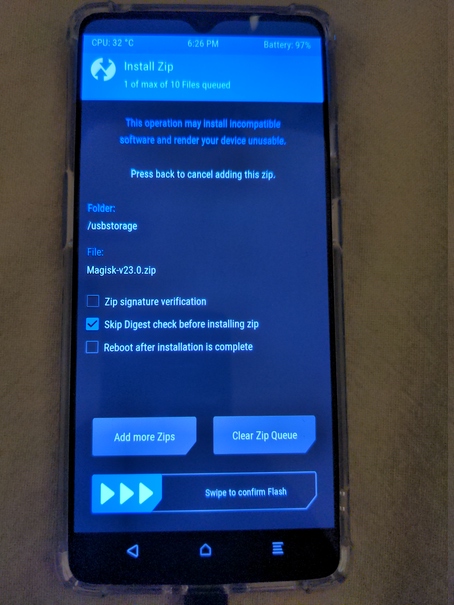
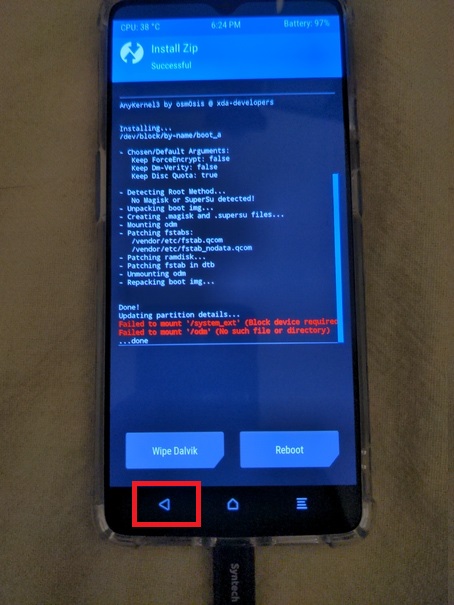 Select the Magisk-v23.0.zip file.

Leave the options default and swipe to confirm.
Wait for the install to complete and then select the Reboot button.
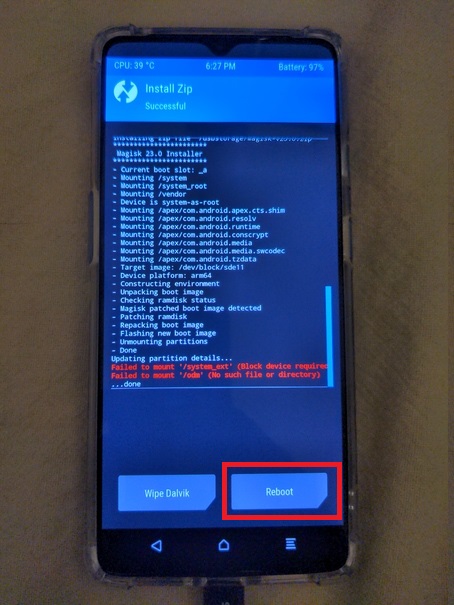
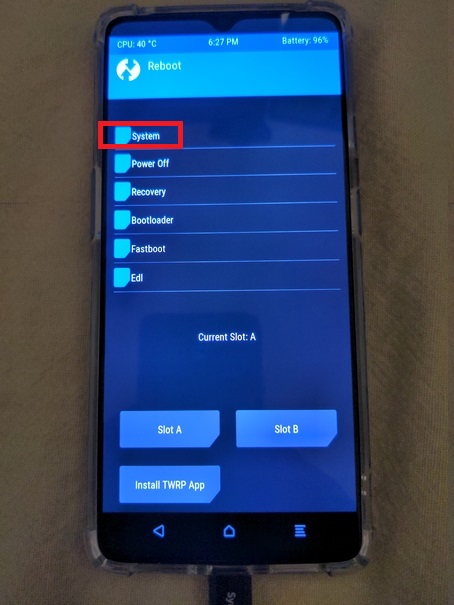
Select the System option to reboot into the system partition.
We formatted the data so it will take some time for the phone to fully load. When it finally boots into the Android startup, configure the phone. Assuming all goes well, we won't be wiping this device any more so configure it accordinly (keep in mind your phone is to be rooted with hacker software - probably skip configuring your email and banking apps). Ensure you configure either the mobile network or WiFi as you will need an internet connection for the next step.
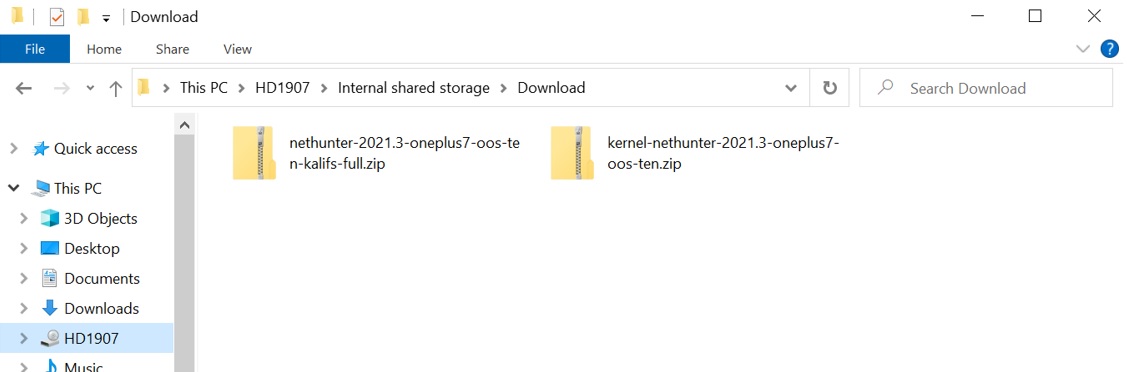
With your phone setup and connected to WiFi, we now must copy over the NetHunter and kernel files. Connect your phone to your Windows 10 device via USB data cable. Find the notification stating your phone is USB charging. Tap it twice and select File Transfer to allow file transfers as before. Copy the following NetHunter and NetHunter kernel installs to the phone's internal storage; I think the Download folder is an appropriate location.
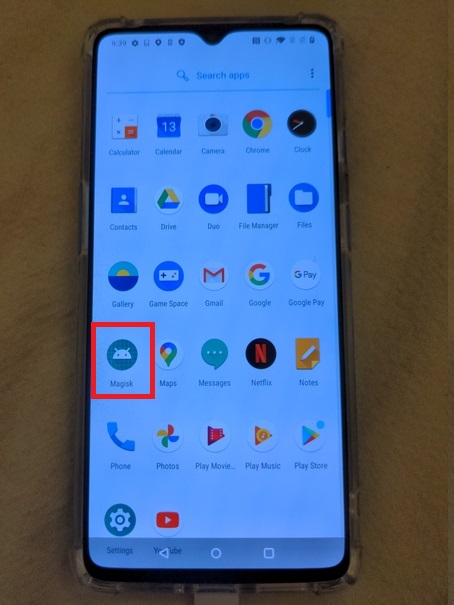
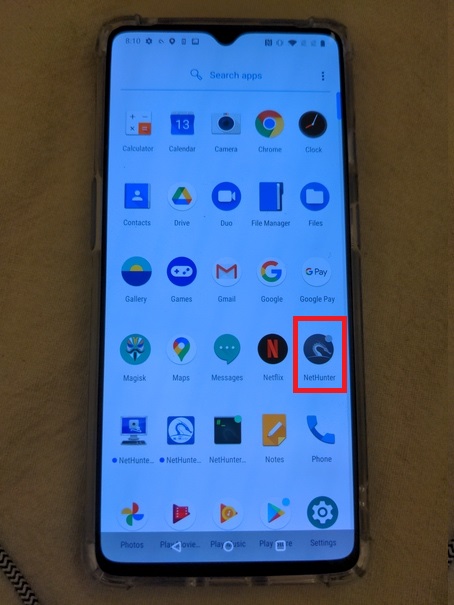
Back on your phone, open your apps and find the Magisk app.
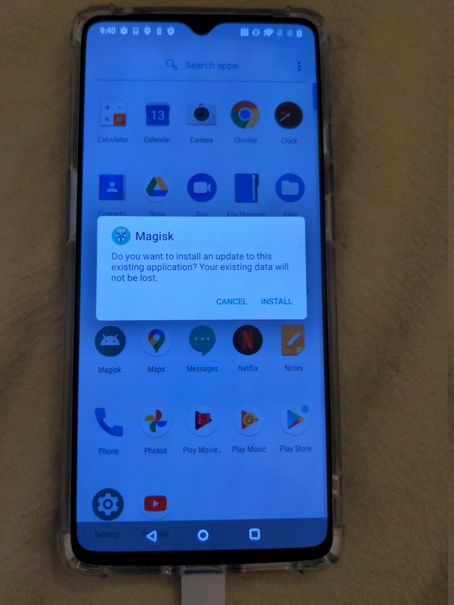
Opening it will prompt you to upgrade it.
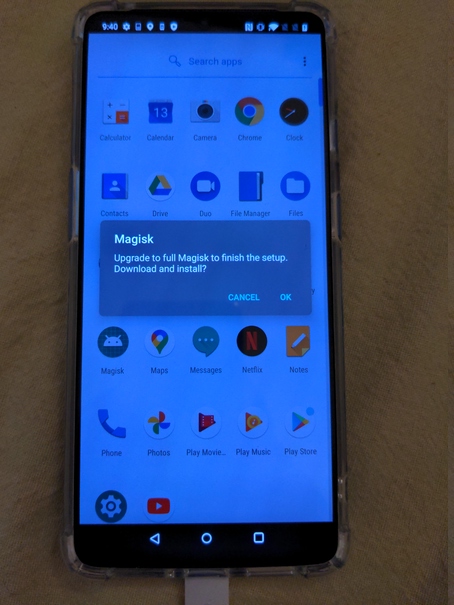
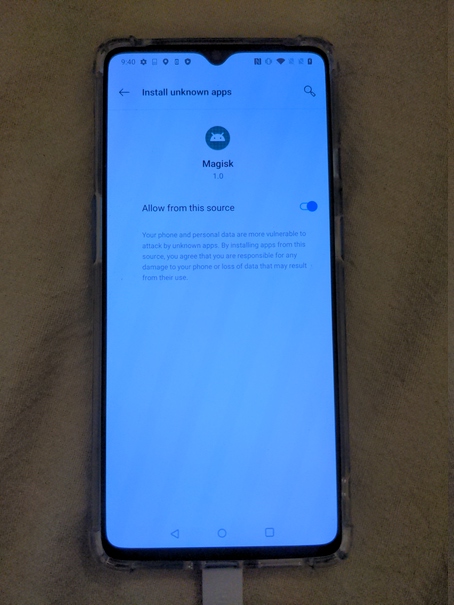
Click OK and then you'll need to allow apps to be installed by Magisk. When prompted click the Settings link and then toggle to allow Magisk to install apps.
Install the upgrade to Magisk.
Reboot your phone when prompted.
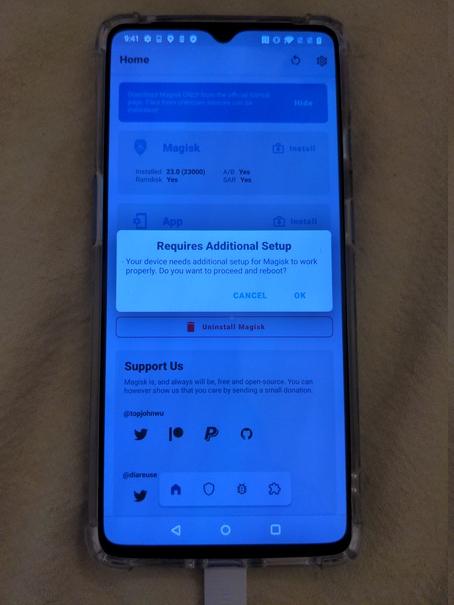
With your phone booted into OOS, go back in your apps and select the Magisk app again, complete with snazzy new icon. The Magisk section toward the top of the screen should show that it was properly installed. At the bottom of the Magisk app, click the icon that looks like a jigsaw puzzle piece.
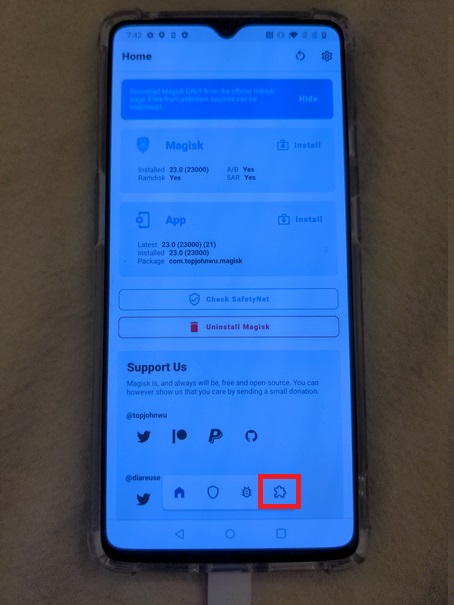
Then select the “Install from storage” button at the top.
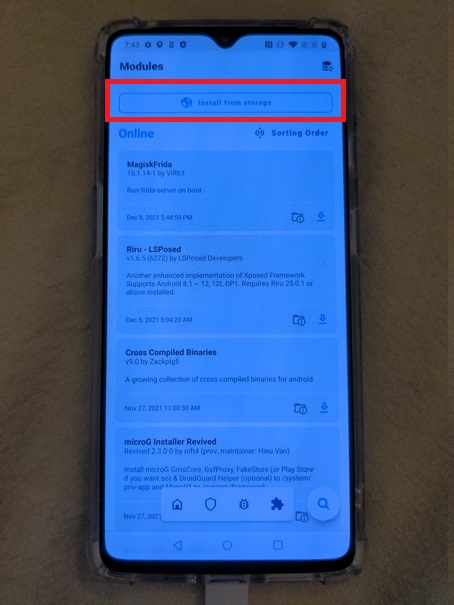
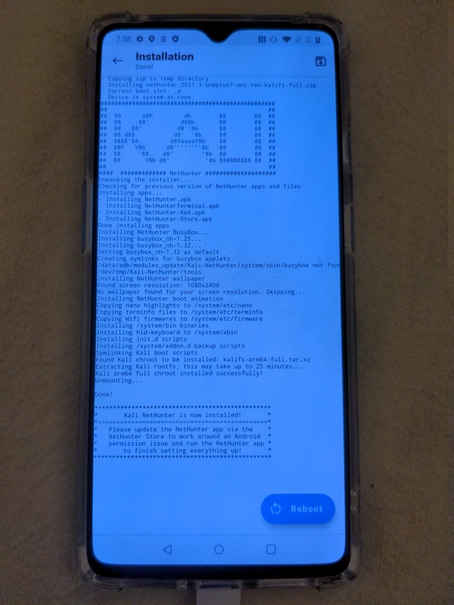
Locate the NetHunter-2021.3-onplus7-oos-ten-kalifs-full.zip file you transferred over earlier and allow it to flash to the phone. This will take a while.
With NetHunter installed, we need to install the kernel via TWRP. Unlock Developer options and then enable USB debugging via Settings. Connect your phone and the computer via USB data cable. Open a command prompt, navigate to your platform-tools folder and reboot the phone into recovery with the following command.
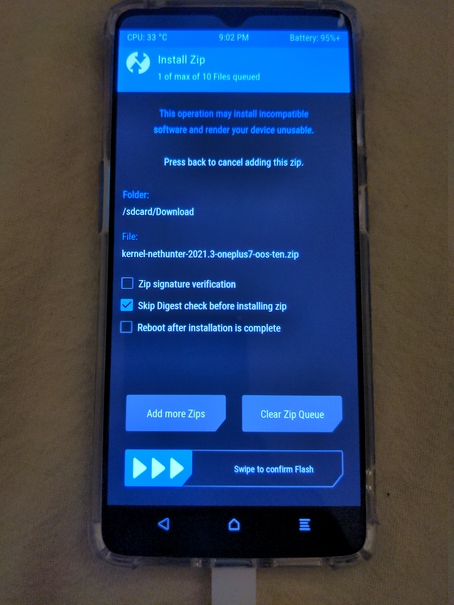
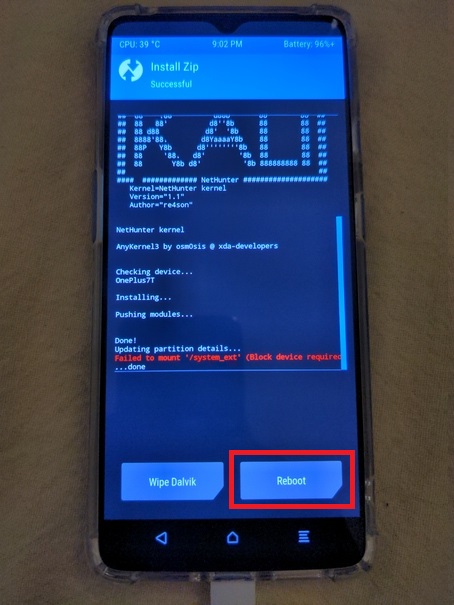
Within TWRP, select the Install button and then navigate to the kernel-nethunter-oneplus7-all-20210531-signed.zip file that you copied to the phone's internal storage earlier. Leave the default options and swipe to confirm the install.
Reboot the device to System when it finishes.
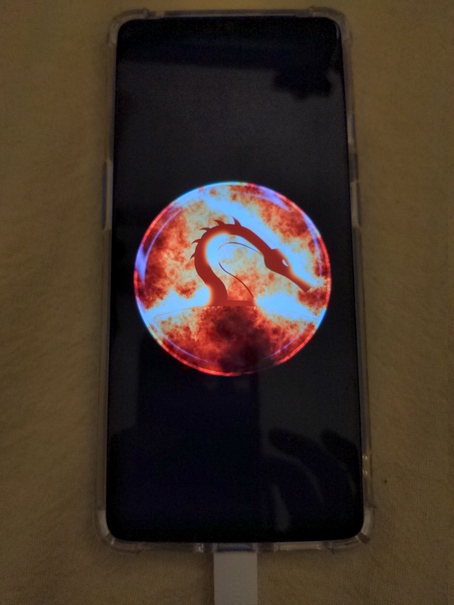
The OnePlus logo will be replaced with a more photogenic dragon that Offensive Security no doubt shelled out serious coin for. My certification fees hard at work.
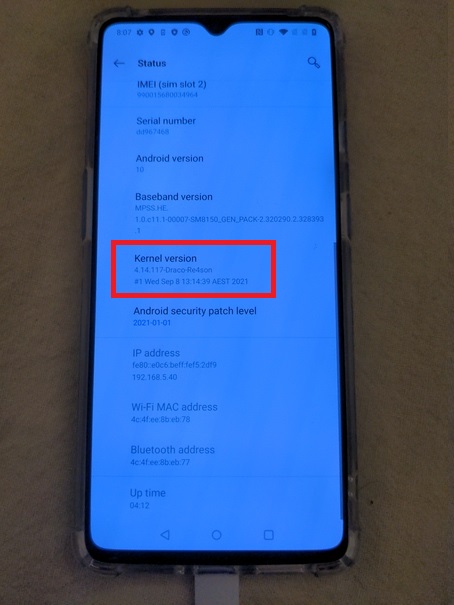
To verify the kernel install navigate to Settings -> About phone -> Status. Under Kernel version it should say "4.14.117-Draco-Re4son" or similar, depending on the version you installed.
 Congratulations! You've rooted your OnePlus 7T with NetHunter. We have a few more steps still to get it setup and configured.
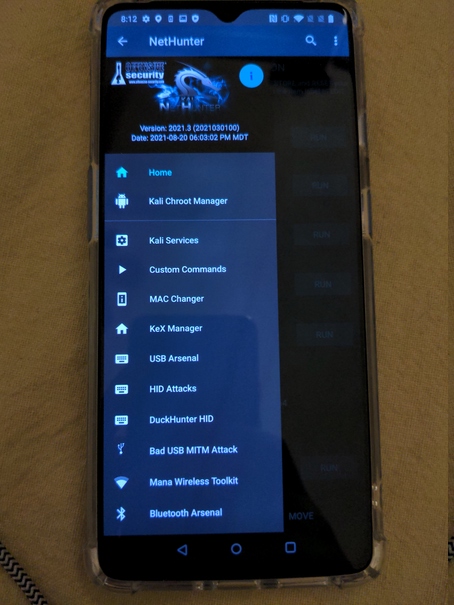
The first time you open the NetHunter app be sure to grant all permissions it asks for. You just rooted your phone for it, so be sure it has unfettered access. You'll then need to setup the Chroot. First open the NetHunter app.
Within the NetHunter app, select Kali Chroot Manager.
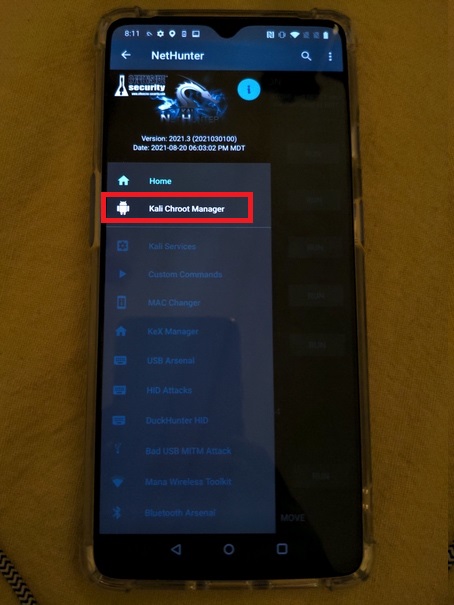
Click the Start Kali Chroot button.
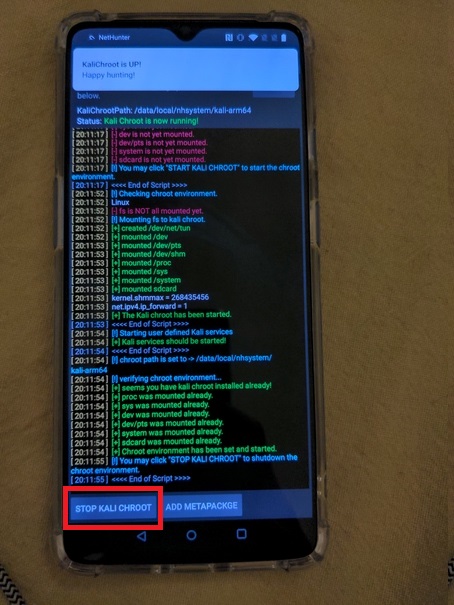
That's it, Kali NetHunter is up and running.
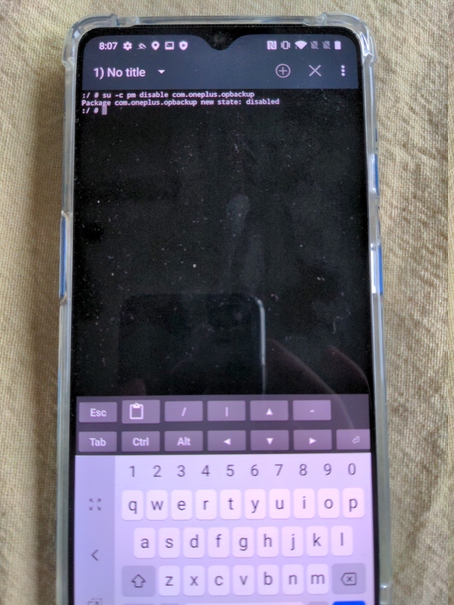
If you use your NetHunter device for any length of time, you'll notice that the battery drains...fast. That's an understatement, really. To resolve this issue and to keep the OOS version from updating, we need to run a couple commands on the phone. The first one will disable the OnePlus update service and comes from the official NetHunter OnePlus 7 install guide (https://www.kali.org/docs/nethunter/installing-nethunter-on-the-oneplus-7/).
NetHunter Terminal -> AndroidSU -> enter the command:
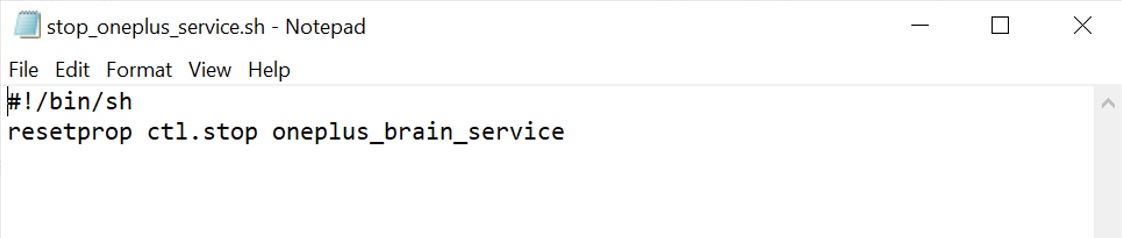
Next, we'll need to stop the OnePlus Brain Service which is responsible for the crazy battery drain (drain rhymes with brain). The following command stops this service (you can enter this command manually but continue reading for a more permanent solution).
This command works to address the fast battery drain, but will need to be executed again every time the device is rebooted. We will therefore create a startup shell script for this. On your Windows 10 device, create a new text file called “stop_oneplus_service.sh” with the following contents. Save this file to your platform-tools directory.
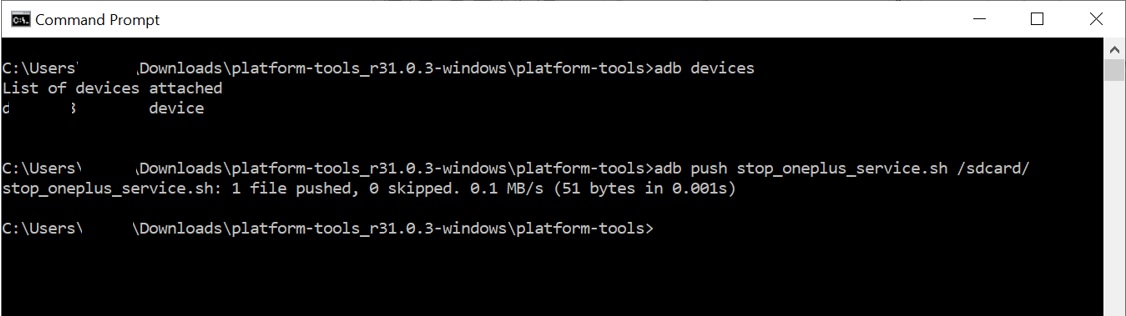
Connect your phone with your Windows 10 device via USB data cable. Open a command prompt and navigate to your platform-tools directory. If your adb server is not running, you can start it via the following command. Allow USB debugging from your phone if necessary.
We will copy our bash script from our Windows 10 device to our phone using ADB. However, we won't be able to copy it into the directory required due to privileges, so we will first copy the file to the /sdcard/ directory on our phone.
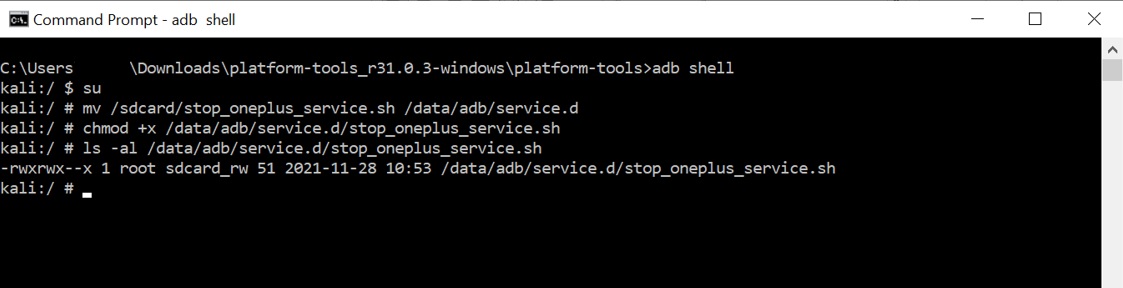
We'll then use ADB to obtain a shell on our device where we can elevate our privileges. After entering the following commands check your phone quickly as you may need to grant additional permissions to the Magisk app. Note that you can skip these two commands if you want to perform the file mv and permissions modification (see the next step) through the Android NetHunter Terminal (AndroidSU) on your phone directly. I find it is easier with a full keyboard via ADB :-)
We then copy the file to the directory where it will be executed upon device startup, and we will modify the file permissions to make the script executable.
Now this script will execute and disable the “brain service" upon every boot. Go ahead and reboot your device now to test out the script. Keep an eye on how fast your battery drains to verify it is working.
With NetHunter fully installed you can verify your device is encrypted via Settings -> Security & lock screen -> Advanced -> Encryption & credentials
It is now safe to setup the screen lock/fingerprint/face unlock and continue using your device. Enjoy having a fully featured pentesting framework in your pocket!
Information provided is for educational purposes only or for use in legal pentesting engagements and must not be used for illegal activities.
This website does not use cookies or other technologies to track your activities. Please see our Privacy Policy.
Copyright © 2021-2022 Auspicious Security LLC